How to Use Evernote Backup Tool: Complete Step-by-Step Guide
Learn how to backup all your Evernote notes to a local database and export them to ENEX, HTML, or Markdown format. This comprehensive guide covers installation, setup, and all features including Obsidian migration.

Introduction
Evernote Backup Tool is a desktop application that allows you to create local backups of all your Evernote notes. Whether you're concerned about data loss, want to migrate to another app, or simply want an offline copy of your notes, this tool makes it easy.
In this guide, we'll walk through the entire process from installation to export, covering all features and options along the way.
System Requirements
macOS
- • macOS 10.14 (Mojave) or later
- • 100 MB free disk space
- • Internet connection for sync
Windows
- • Windows 10 or later
- • 100 MB free disk space
- • Internet connection for sync
Step 1: Download and Install
For macOS:
- Download the
.dmgfile from our website - Open the DMG and drag the app to your Applications folder
- First launch: Right-click the app and select "Open" (required for unsigned apps)
For Windows:
- Download the
.exeinstaller - Run the installer and follow the prompts
- Launch from Start Menu or Desktop shortcut
Step 2: Configure Settings
When you first open the app, you'll see the Settings section at the top. Here's what each option means:
Settings Options:
-
Database file:
The filename for your local database. Default is
en_backup.db -
Backend:
Choose
evernotefor International orchinafor Yinxiang (印象笔记) - Use system SSL CA: Enable this if you encounter SSL certificate errors
Tip: Click "Save Settings" to remember your preferences for next time.
Step 3: Initialize Database
This step creates your local database and authenticates with Evernote.
For Evernote International (OAuth):
- Click the "Init DB" button
- A browser window will open for Evernote login
- Log in to your Evernote account
- Click "Authorize" to grant access
- Return to the app - it will confirm success
Note: If your token expires later, use the "Re-authorize" button to refresh it without recreating the database.
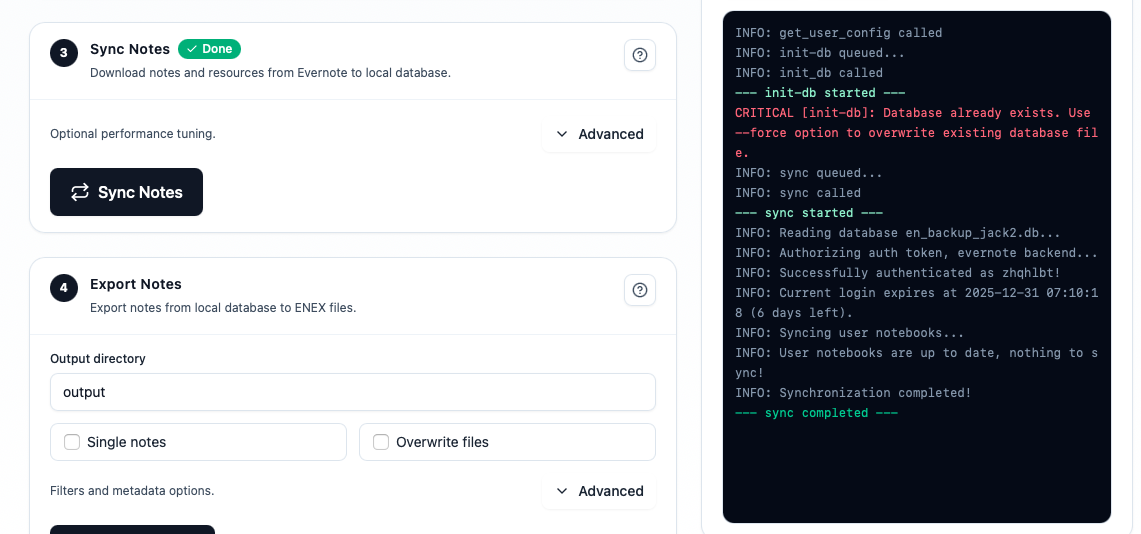
Step 4: Sync Notes
Now download all your notes to the local database.
- Click the "Sync Notes" button
- Watch the progress bar as notes download
- The log panel shows real-time progress
- Wait for "sync completed" message
Advanced Sync Options:
- Include tasks: Also backup Evernote Tasks
- Download workers: Number of parallel downloads (default: 4)
- Cache limit: Memory limit for download cache (default: 256 MB)
Good to know: Subsequent syncs are incremental - only changed notes are downloaded, making them much faster.
Step 5: Export Your Notes
Export your backed-up notes to ENEX, HTML, or Markdown files that can be imported into other apps or browsed offline.
Activation Required: The Export feature requires a Pro license. Click the "Activate" button and enter your activation code.
- Set the Output directory (default: "output")
- Choose your Export Format: ENEX, HTML, or Markdown
- Configure export options as needed
- Click the "Export Notes" button
- Wait for export to complete
- Click "Open" button to view exported files
Export Format Options:
- ENEX: Standard Evernote format, compatible with Apple Notes, Notion, Joplin, etc.
- HTML: Creates a browsable knowledge base with auto-generated index page and search functionality
- Markdown: Perfect for Obsidian, Logseq, or any Markdown-based note app
Common Export Options:
- Single notes: Create one file per note (instead of per notebook)
- Overwrite files: Replace existing files
- Include trash: Also export deleted notes
- Separate attachments: Extract attachments to separate folder
- Notebooks filter: Only export specific notebooks (comma-separated)
- Tags filter: Only export notes with specific tags
HTML Export Tip: The generated index.html file allows you to search note titles and browse by notebook. Just open it in any browser - no server needed!
Markdown Export Tip: For Obsidian users, point Obsidian to the exported folder and all your notes will be ready to use with proper links and attachments.
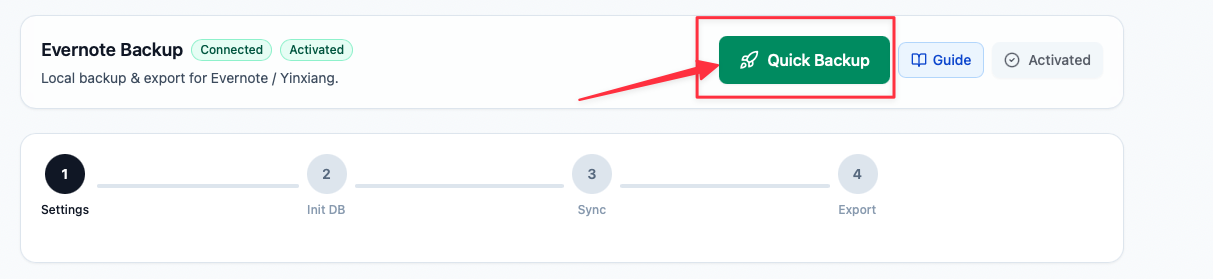
Quick Backup Feature
Want to run all steps with one click? Use the Quick Backup button!
One-Click Backup
The green "Quick Backup" button in the header automatically runs Init DB → Sync → Export in sequence. Perfect for regular backups!
Troubleshooting
"Authentication token expired" error
Your Evernote token has expired. Click the "Re-authorize" button to refresh it.
"Database already exists" message
This is normal! It means you've already initialized. The app will continue to sync as expected.
SSL certificate errors
Enable "Use system SSL CA" in Settings → Advanced options.
Sync is very slow
The initial sync downloads all notes and attachments. Increase "Download workers" in Sync → Advanced for faster downloads.
Frequently Asked Questions
Where are my backup files stored?
macOS: ~/Library/Application Support/EvernoteBackupTool/
Windows: %APPDATA%/EvernoteBackupTool/
Can I import ENEX files to other apps?
Yes! ENEX files can be imported to Apple Notes, Notion, Joplin, OneNote (via converter), and many other note-taking apps. For Obsidian or other Markdown-based apps, use our Markdown export instead.
How often should I backup?
We recommend weekly backups for active users. Since sync is incremental, regular backups are fast.
Conclusion
You've now learned how to use Evernote Backup Tool to create secure local backups of your notes. Regular backups ensure you never lose your valuable data, even if cloud services change or become unavailable.
If you have questions or need help, contact us at [email protected].
Related guides
How to Back Up Evernote Before Changing Apps or Plans
Create a safer local archive before changing apps, changing plans, or reorganizing important notes.
Evernote to Apple Notes: Best Export Workflow Before You Move
Prepare a readable archive and verify attachments before moving notes into Apple Notes.
Evernote to Joplin: ENEX vs Markdown for a Safer Migration
Compare preservation and editability before moving your notes toward Joplin.